

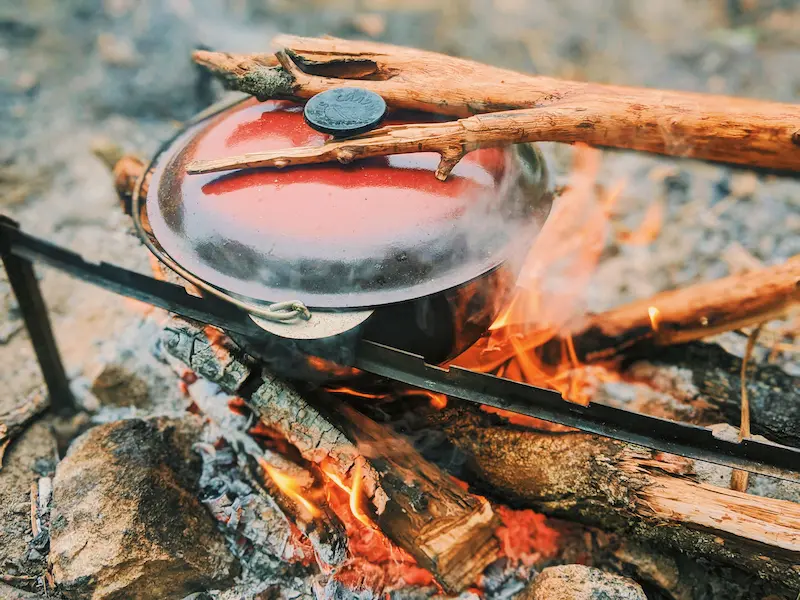
There’s a particular kind of quiet that settles over a campsite once the coals go from flame to glow. Someone crouches by the fire ring, adjusting a skillet. Someone else pours coffee. The bacon starts to hiss before anyone’s fully awake. For a few minutes, nobody’s in a hurry to be anywhere else. That’s the whole appeal of cooking over fire while camping. It’s slower. It smells better. It turns a meal into something you actually pay attention to.
But maybe you’ve pulled a scorched pot out of the coals before. Or watched dinner stick to a pan that wasn’t built for this. Open-fire cooking has a small learning curve, and that’s normal. Once you know a few basics about camping food over fire, it stops feeling like a gamble. It starts feeling like one of the best parts of the trip.
Why People Love Cooking Over an Open Fire
Smoke does something a stove just can’t fake. It settles into eggs, into bread, into a pot of chili simmering at the edge of the coals. It tastes like the outdoors in a way that’s hard to describe until you’ve had it.
It’s also slower, in a good way. You’re not standing over a burner watching a timer. You feed the fire, check the coals, maybe step away to pour a drink or watch the light change, then come back to stir something. That rhythm is part of why it feels so different from cooking at home.
Most families have a version of this story: a fire that never quite goes out, someone tending it while everyone else fishes or hikes or just sits around talking, and dinner slowly taking shape without anyone standing guard over a stove. It’s less about finishing the food quickly and more about the fire holding the whole group together for a few hours. That’s honestly half the reason people keep coming back to it, trip after trip.
Before You Start, Pick the Right Pot
Cast Iron vs. Enameled — The Mistake Worth Avoiding
Here’s a gentle heads-up before you pack: not every pot labeled “Dutch oven” belongs in a campfire.
Plain cast iron, the kind brands like Lodge make, handles this job well. It can sit directly in coals, take a beating, and build up seasoning over years of use. Enameled cast iron tells a different story. Think of the glossy, colored coating on a piece like Le Creuset. That coating is essentially glass fused to the metal, and it doesn’t love quick temperature swings. It’s a wonderful pot, just one that’s happier on your stovetop at home.
If you own an enameled piece and feel tempted to bring it camping, pack your plain cast iron instead. Save the enameled pot for indoor meals. Your cookware will thank you.
Legs or No Legs?
Cast iron Dutch ovens come in two styles, and this trips up a lot of new campers.
- Legged, “camp oven” style — This one sits right over coals. The legs keep the pot from smothering the fire underneath, and the lid usually has a rim so you can pile coals on top too, cooking from both directions at once. Choose this style for real campfire cooking. You can even stack two together to bake and simmer at the same time.
- Legless, flat-bottom style — This one belongs on a stovetop or in a home oven. It can still come camping if you prop it on a tripod or balance it on a few flat rocks, but it wasn’t built to sit straight in the coals.
Buying your first Dutch oven specifically for camping? Go with legs. Already own one for home cooking and just want to bring it along sometimes? A simple tripod stand does the job.
What Size Do You Actually Need
Dutch ovens come sized in quarts, and it’s easy to either underbuy or overdo it:
- 4-quart — good for 1 to 3 people
- 6-quart — good for 3 to 5 people
- 8-quart — good for 5 to 8 people
- 10-quart or larger — good for bigger groups or families
Most couples or small families do fine with a 6- or 8-quart pot. It covers everything from a simple breakfast to a full pot of stew.
The Basics of Cooking Over Fire
Once you have the right pot, the technique itself is simpler than it looks.
- Cook over embers, not flames. A roaring fire looks great but cooks unevenly and burns food fast. Let the wood burn down to a steady bed of glowing coals first. That’s where the real heat control lives.
- Put more coals on top than underneath. This one habit prevents scorched bottoms and raw tops. Try a thin layer under the pot and a thicker layer on the lid, and you’ve basically built an oven.
- Start simple. A cast iron skillet breakfast, think eggs, potatoes, a little bacon, forgives almost any mistake. From there, try skewers marinated at home the night before. A Dutch oven cobbler or a simple flatbread makes a nice way to test out baking over coals without much risk.
Care and Cleaning Tips
Cast iron should look a little rough after a weekend at the fire. That’s honestly part of the charm.
For cleaning, hot water and a chainmail scrubber handle the inside without stripping the seasoning. A damp rag usually takes care of the outside, and soot on the bottom is normal, so don’t worry about scrubbing it off every trip. A cardboard box or old tote works fine for storage and transport between uses.
Own an enameled piece that’s seen some fire heat? Check it over for small cracks now and then. That glass-like coating can develop hairline fractures under repeated heat stress, and it’s better to catch that early than find out mid-meal.
A Few Gentle Safety and Etiquette Reminders
A couple of small habits go a long way toward keeping fire cooking easy and low-stress:
- Check local fire restrictions before you head out. Bans can pop up quickly during dry stretches of summer.
- Make sure the coals are fully out and cool to the touch before you leave camp. A good rule of thumb: you should feel confident running your hand over the ash.
- Pack an extra layer for early mornings by the fire. Even in warmer months, that first cup of coffee often happens in air cooler than you’d expect.
None of this needs to feel like an anxious checklist. Think of these as the quiet habits that let you actually relax around the fire instead of half-worrying about it.
Bringing It All Together
By the time the coffee’s ready and the eggs are done, you’ll likely forget you were ever nervous about any of this. That’s really the heart of cooking over fire: not doing it flawlessly, but slowing down long enough to let a simple breakfast become the best part of the morning. Pick the right pot, respect the coals a little, and the rest tends to take care of itself.
Key Takeaways
- Use plain cast iron for open-fire cooking; save enameled pots for home use, since rapid heat changes can damage the coating.
- Choose a legged Dutch oven for true campfire cooking, or pair a legless one with a tripod if you already own one for home use.
- Size your pot to your group: 4-quart for 1–3 people, 6-quart for 3–5, 8-quart for 5–8, and 10-quart or larger for bigger crews.
- Cook over glowing embers rather than open flame, and put more coals on the lid than underneath the pot.
- Clean cast iron with hot water and a scrubber rather than harsh abrasives, and check enameled pieces occasionally for cracks.
Recommended Products
Waiting on a slow-cooked camp breakfast feels even better with something warm to wrap up in. The Overland Roamer Blanket fits right into that morning-by-the-fire scene. Its soft woven cotton and van-life sunset design make it easy to toss over your shoulders on a cool morning, or spread out as a seat by the fire ring while breakfast comes together.
Related Reading
Continue Reading on Tropical Adelie
- How to Make Camping Comfy: Small Upgrades for a Cozier Night Outside
- How to Make Your Campsite Actually Cozy
- Why More Campers Are Choosing Glamping Over Roughing It
Recommended External Resources
- Campfires and Fire Safety — National Park Service
- Leave No Trace Seven Principles — Leave No Trace Center for Outdoor Ethics
Final Thoughts
Cooking over an open fire isn’t about getting every step perfect. It’s about slowing down enough to notice the smell of woodsmoke, the sound of a skillet settling into the coals, and the people gathered around waiting for the same pot to be ready. Pack the right cast iron, respect the fire a little, and let the rest of the trip unfold at its own pace.